I wanted to tell you guys about the budget gaming PC I will be building once I save up some money.
Here's a list of all the parts:
Processor: Amd athlon X4 760K
Motherboard: MSI A 78m-E35
GPU/Graphics card: Sapphire Radeon R7 260X
RAM: 8GB Crucial Ballistix Sport
Hard Drive: 1TB Western Digital Black
Power Supply: 430W Corsair CX430
Case: Corsair Spec 01
And along with building the PC I'm planning on buying some new gear as well(Basically a whole new set-up):
Monitor: BenQ X1242OTE
Mouse: Razer Abyssus Optical PC Gaming Mouse
Mouse Pad: Razer Goliathus Standard Mouse Mat
Keybord: SteelSeries bgv2 red cherry switches edition
Headset: SteelSeries 5HV3
So I did some math and I came up with the cost of everything, and, with the exception of possibly finding some of this for cheap on Ebay/Craigslist, its roughly around $1200 bucks american dollars.
Wish me luck, and take care!
Monday, July 28, 2014
Wednesday, July 23, 2014
The AWP.

Yeah, I know I said I would do a post on Nuke, but I thought I should do this weapon and then the MP5(SMG) before that.
Every FPS game has its ultimate sniper rifle. Counter Strike has the AWP. In the hands of a skilled player the AWP is a very, very lethal weapon.
So, first thing, the AWP has to be shot standing still to be accurate.
And one of the absolute best things I've learned is something called pre-scoping. What this means is you zoom in before you peak/jump out from behind cover and your already zoomed in, so if anyone is in your sights you can just shoot them instead of coming out, zooming in, aiming and then shooting. If you dont pre-scope while coming out of cover your opponent will see you and move, and by the time you've zoomed in your dead. So, practice this in Deathmatches A LOT, trust me, this will help you immensely.
After pre-scoping comes the different styles of shooting:
Quick-scoping
no-scoping
Stand-scoping(cant remember the actual name of the technique but I will explain it to you.)
I will start with quick scoping. Basically all you need to do is right click (zoom) and left click (shoot) really fast after that. So its almost like your hitting both mouse buttons at the same time. Hud_saytext 1 (its in my config guide) will help you with this. Another technique similar to quick-scoping is when you shoot, switch to your pistol, and then back to the AWP, really fast (if you have default Q to switch between your primary and secondary then you can just hit Q twice really fast) This removes some of the delay time before you can take another shot.
And no-scoping is pretty self explanatory--you just shoot without zooming in. But its a little bit more complicated then that. Look on youtube for some of the best AWPers and you will see that after they take a zoomed in shot and they missed, or there's another target, they will move, stop, and then no-scope. You will just have to play with the AWP a lot and figure it out.
And stand-scoping is just where you stand still, line up, and wait for your enemy to fall into your crosshairs.
That's pretty much all I have to say about the AWP except that when your in a wide open space you should strafe and then stop when you want to shoot. I also want to encourage you to practice with this weapon a lot--unless you don't like AWP then you can just use automatics. But whatever the case, you should practice as much as possible.
Take care and have fun!
Thursday, July 10, 2014
De_Dust 2 Part 5
We are almost finished with Dust2! Lets jump right to it! I'm not gonna go in any particular order:P
This nade is good for terrorists early round going into Bombsite B. Just go into tunnels and throw your nade at an angle right here:

It goes off right here:
 Another one for lower B tunnels. You throw it along the curvy wall:
 That goes off right here:
 And you can also throw down the same way:
Another one....:
 This one goes off here:
 And here's another one for late round on terrorist side:
 And that one goes off here:
 And that's all for De_Dust 2! Just remember to practice A LOT. And be creative with your flashes, try new angles and such. The next map will be De_Nuke. Have fun and take care!
This nade is good for terrorists early round going into Bombsite B. Just go into tunnels and throw your nade at an angle right here:
It goes off right here:
Another one....:
Tuesday, July 8, 2014
Configuration Update!
I just wanted to let you all know that I will be updating my post on configuration, due to the game changing so much over the years:P
Cheers!
Cheers!
Saturday, July 5, 2014
De_Dust 2 Part 4
Howdy, all. This nade is really good early round, but you have to do it really fast. So practice, practice, practice, practice. You have to run forward when you throw(actually, you should do that with all the nades) and then back up. And a real quick tip: too throw flashbangs really fast you have to hold down the left mouse button. Try it and you will know what I mean.


 This goes off here:
 Sorry for the late post:P
So, you go up to catwalk(do NOT fall of the stairs) and throw the flashbang right here:
This will go off right here:
And right after you throw that you throw another one here:
Saturday, June 28, 2014
De_Dust 2 part 3
In this post I will show you some nading (grenades) spots. Lets start with bombsite B again.
The very first nade I'm going to show you is, what I find to be, the most essential for this bombsite.
This is more of a retake flash for mid to late round. You just start by going up to the main entrance to Bombsite B--make sure your opponent cant see you from inside the Bombsite--And throw a flashbang over the top of the wall. If you throw it too high, it wont flash anybody, too low, and it will bounce back and flash you in the face. I would recommend practicing this in a server all by yourself. This is especially good if you have teammates flashing from different parts of the wall, you might want to throw one into the window too.
Here's a screenshot mid-throw:
 You can throw it over anywhere along that wall.:)
I was thinking about whether I should show you this next one or not because I don't see it used too often, but, I think you should know them all just in-case:P
This one you just throw it at the wall where my crosshairs are in attempt to get it over the wall to the left. Its kind of hard to explain, so I will use some screenshots:

 Above is where it goes off. This will flash anyone going through mid.
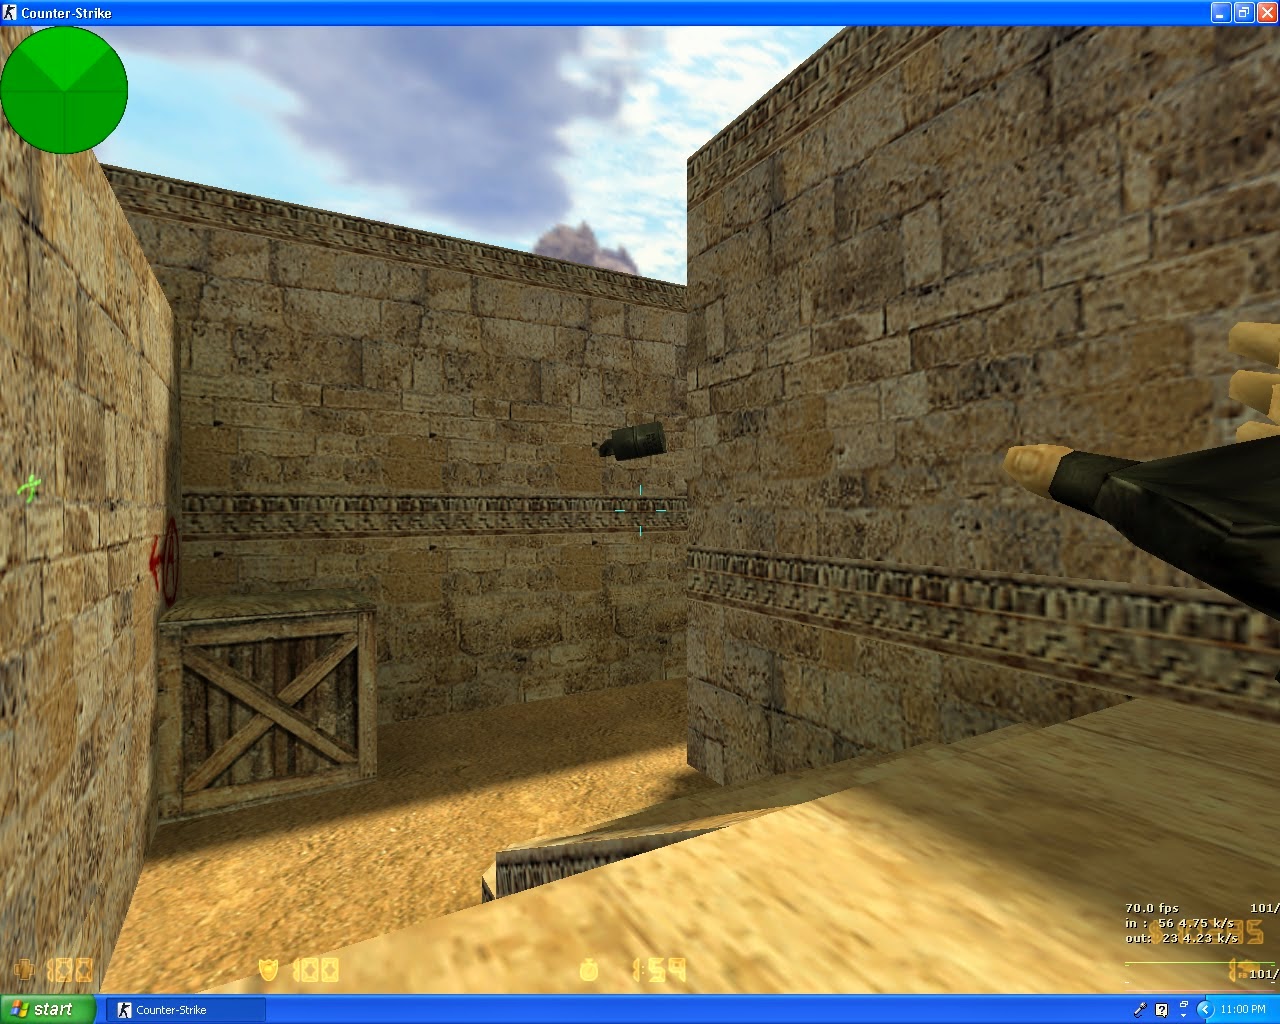
This next nade is one of my favorites. This one is mainly for flashes and smokes but you can use an HE grenade as well.
You just go right over to bombsite A and throw a flash/smoke/HE EXACTLY right here:
 Here's where the Flash/He/Smoke goes off:


The very first nade I'm going to show you is, what I find to be, the most essential for this bombsite.
This is more of a retake flash for mid to late round. You just start by going up to the main entrance to Bombsite B--make sure your opponent cant see you from inside the Bombsite--And throw a flashbang over the top of the wall. If you throw it too high, it wont flash anybody, too low, and it will bounce back and flash you in the face. I would recommend practicing this in a server all by yourself. This is especially good if you have teammates flashing from different parts of the wall, you might want to throw one into the window too.
Here's a screenshot mid-throw:
I was thinking about whether I should show you this next one or not because I don't see it used too often, but, I think you should know them all just in-case:P
This one you just throw it at the wall where my crosshairs are in attempt to get it over the wall to the left. Its kind of hard to explain, so I will use some screenshots:
This next nade is one of my favorites. This one is mainly for flashes and smokes but you can use an HE grenade as well.
You just go right over to bombsite A and throw a flash/smoke/HE EXACTLY right here:
This next one is good for trying to re-take the bombsite. If your up here on cat-walk and you know an enemy is waiting for you to come out, just throw a flash right here at this slant above the box:
This goes off right here:
Here's another:
This goes off here:
Next part will have some more nades. Have fun, and take care!
Sunday, June 22, 2014
De_Dust2--Learning The Map Part 2
All right, Part 2, baby! Lets jump right into some spams/wallbangs. Lets move on over to long A and work our way to mid and T spawn--Then we will be finished....with the wallbangs:P.
For this spam you are going to go over here to long A and there is an area on this wall right here that you can spam through:
So its like a slant on the wall and you are going to line up and shoot here:
 This should hit someone walking through long A doors.
And this next one is particularly good because sometimes the Terrorists like to hold a flank or something behind this wall and you can often catch them standing there. Just set up and shoot right here:

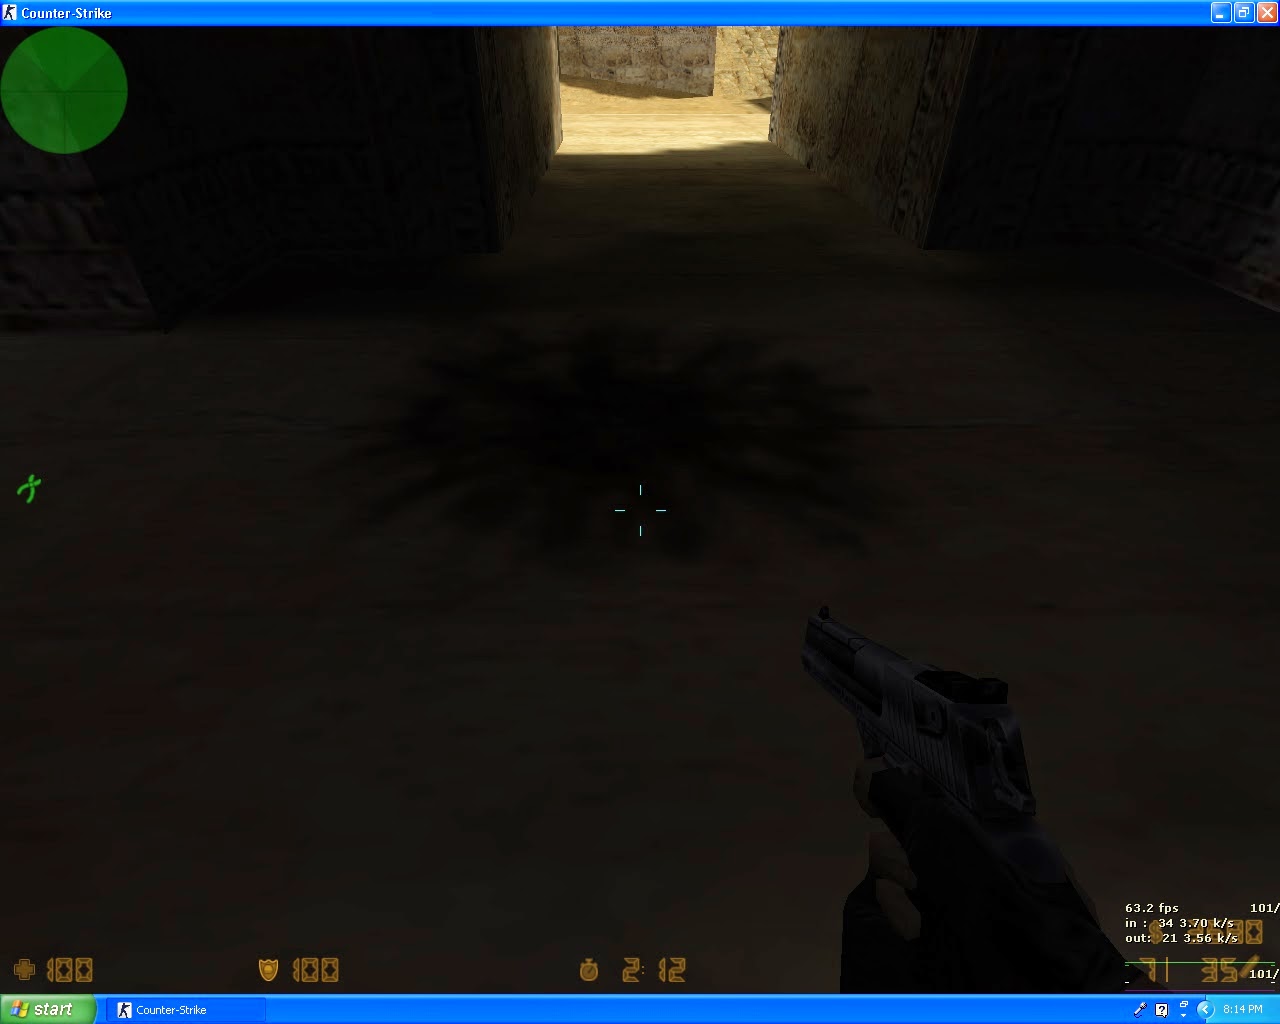
That's for the CT side, now for the T side spamming. The first two I'm going to show you are in B tunnels and you should do these right away. You go up to this wall and shoot right here:

After you've done that one for a few seconds, go right here to this step:

And shoot EXACTLY right here:

And this one you go into the right corner near the Tunnels entrance, crouch, and shoot right here a little to the left of where this archway do-hicky thing starts:

For this next one you step up on this little step right here:

And shoot here:

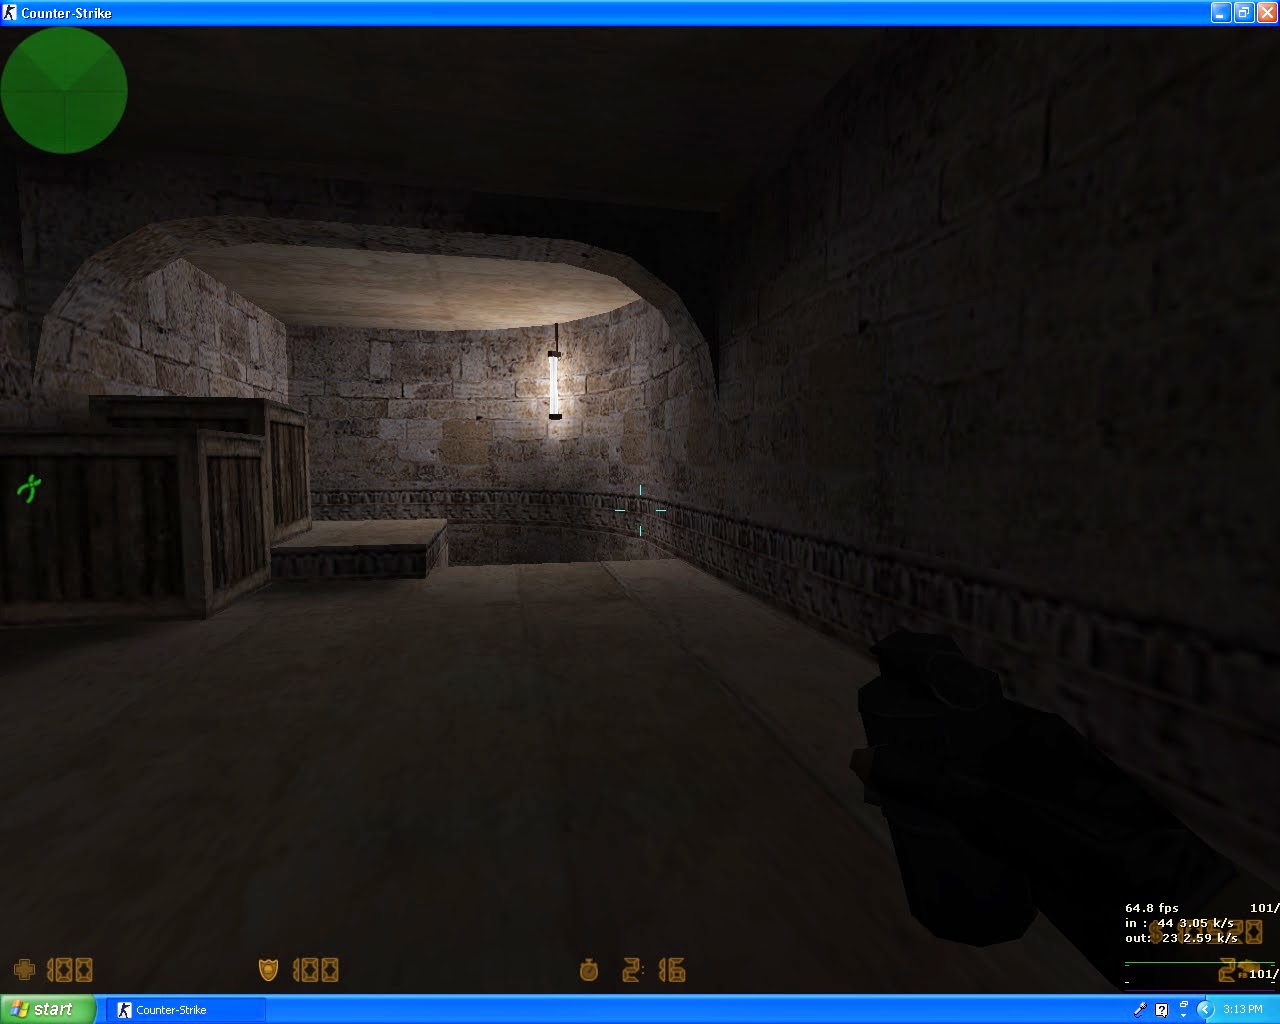
And the last one for upper B tunnels you just go right next to this box, actually where that step was for the last one, and just shoot right here:

Now lets move over to mid/catwalk. This first spam is where CT's will sometimes go in catwalk. You go up to this green box and shoot right here:

And this next one I think is really valuable to know. You know that annoying spot where guys always get
you at the "Goose" spray-paint? Well, when there hiding behind the wall about to come back out you shoot right at this wall HERE--its actually farther to the left then you think:

Another common spot is right here at the CT spawn boxes right here:

And some times they will try to jump up and see where you are, so, just shoot right here while you stand on the second to last step going up:

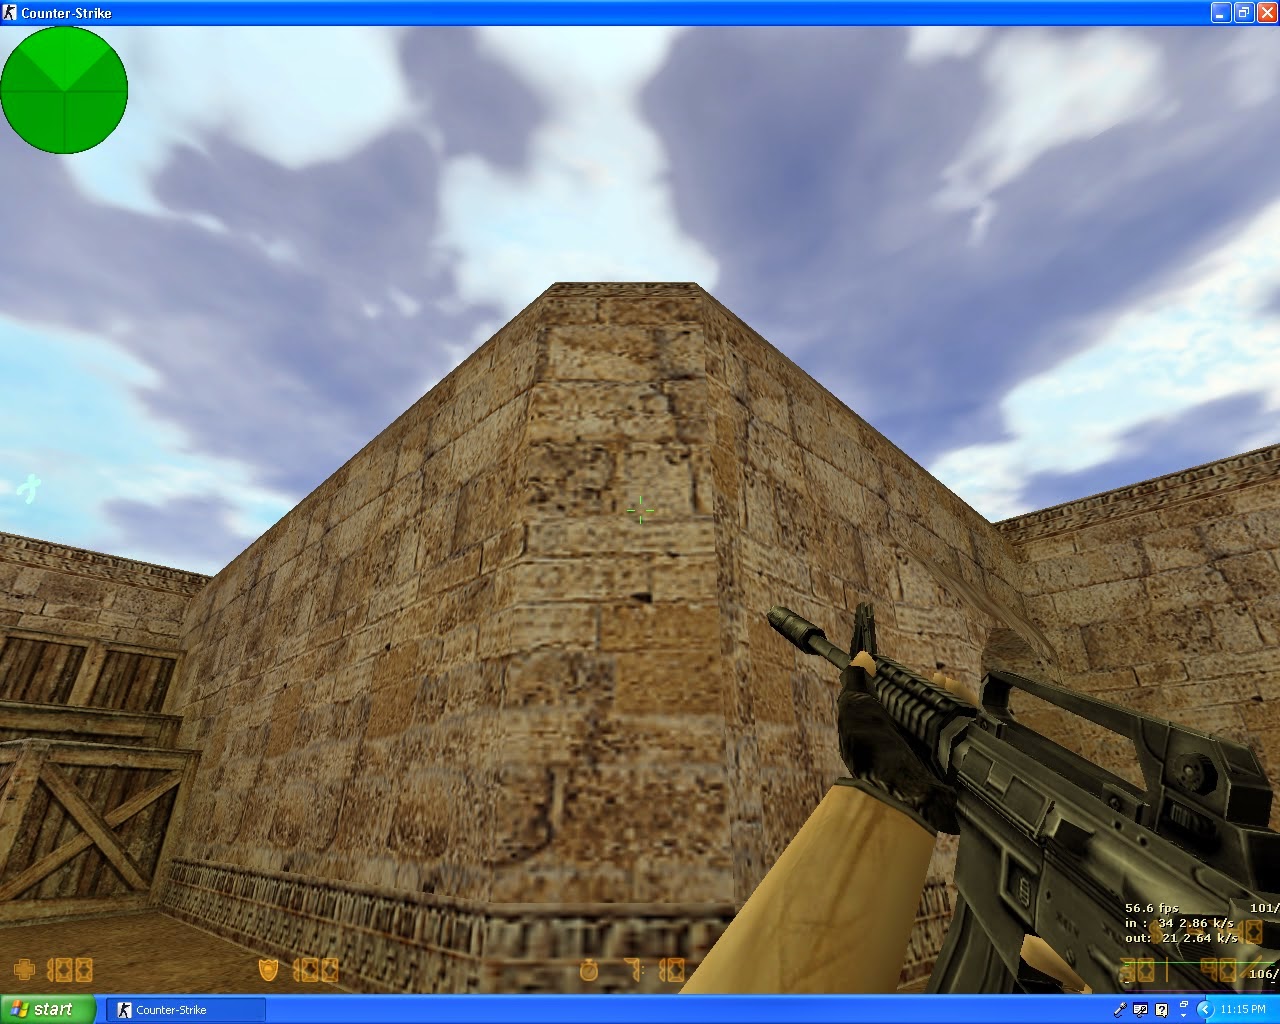
Now were going over to long A. First one you go right outside of Long chamber, line up the door with the big box inside and shoot here like so:

And you can shoot through the floor into Long Pit right here:

Another one right here:

That will catch people running up here:

And you can shoot right here through the floor for a nice headshot:

And another one that goes to CT spawn boxes:
 That's all for part 2, sorry for posting it so late but, hey, life happens! Anyways, I will try for another post this week. Take care and I hope this helps!
For this spam you are going to go over here to long A and there is an area on this wall right here that you can spam through:
So its like a slant on the wall and you are going to line up and shoot here:
And this next one is particularly good because sometimes the Terrorists like to hold a flank or something behind this wall and you can often catch them standing there. Just set up and shoot right here:
That's for the CT side, now for the T side spamming. The first two I'm going to show you are in B tunnels and you should do these right away. You go up to this wall and shoot right here:
After you've done that one for a few seconds, go right here to this step:
And shoot EXACTLY right here:
And this one you go into the right corner near the Tunnels entrance, crouch, and shoot right here a little to the left of where this archway do-hicky thing starts:
For this next one you step up on this little step right here:
And shoot here:
And the last one for upper B tunnels you just go right next to this box, actually where that step was for the last one, and just shoot right here:
Now lets move over to mid/catwalk. This first spam is where CT's will sometimes go in catwalk. You go up to this green box and shoot right here:
And this next one I think is really valuable to know. You know that annoying spot where guys always get
you at the "Goose" spray-paint? Well, when there hiding behind the wall about to come back out you shoot right at this wall HERE--its actually farther to the left then you think:
Another common spot is right here at the CT spawn boxes right here:
And some times they will try to jump up and see where you are, so, just shoot right here while you stand on the second to last step going up:
Now were going over to long A. First one you go right outside of Long chamber, line up the door with the big box inside and shoot here like so:
And you can shoot through the floor into Long Pit right here:
Another one right here:
That will catch people running up here:
And you can shoot right here through the floor for a nice headshot:
And another one that goes to CT spawn boxes:
Subscribe to:
Comments (Atom)